Baofeng DM-X/DM-1702: Is this the saddest radio ever?
If only as a warning to others.
Way back in 1976, General Motors introduced the Chevette, a sad little cramped hatchback that, when equipped with the automatic transmission, could barely drag itself above 100 km/hour. Friends had rusted-out Pintos and Toyotas that we would rather ride in than a new Chevette. GM was the biggest automaker in the world. They had engineering resources in Europe and Asia that knew how to make small cars. There was no excuse for this sorry little atrocity. They should have known better. That’s how we feel about Baofeng and the DM-X / DM1702.
Yeah, we’re dumping on on this radio. If you have the misfortune of having bought one, keep reading because we provide a bunch of links and info to make it usable.
We really don’t want to dump on Baofeng. They make some great cheap radios. We’ve written an entire how-to guide on the UV-B6. It’s been a rugged little starter radio and we’ve recommended it to lots of people. Lots of cheap accessories. A Scout group we helped out with their ham certifications all have them, and they’re still going after two years and plenty of abuse.
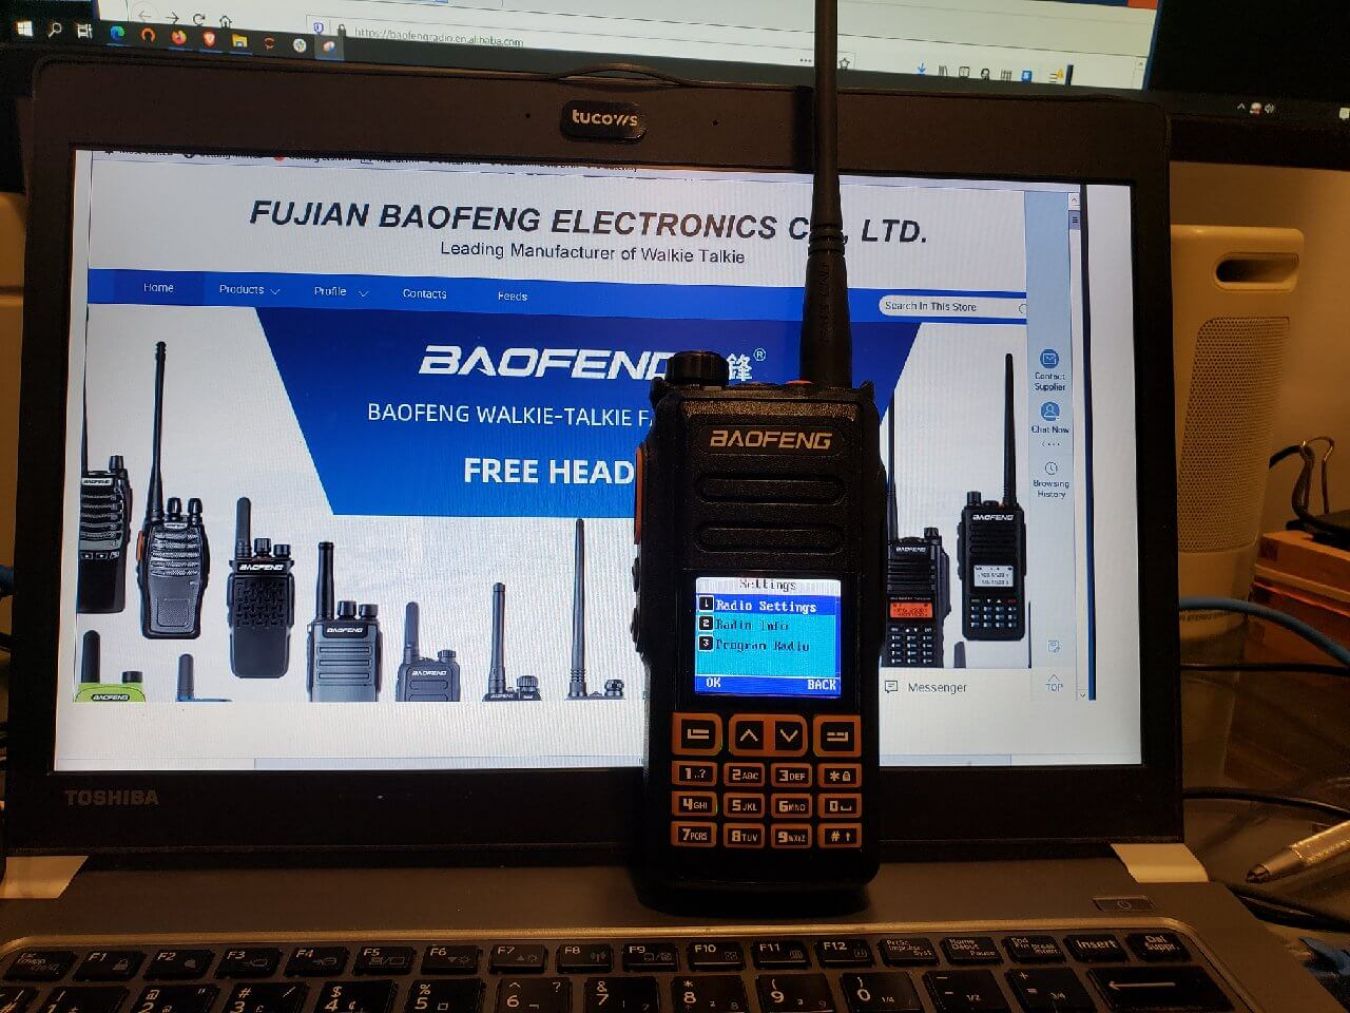
With a goal of trying out one of the digital radio protocols for the first time, we ordered up a Baofeng DMX, which supports the DMR spec. It’s sometimes referred to as the DM-1702, and on their official web site, it’s the DM-1702B. These three are essentially the same radio but with different cases and button layouts.
The manual
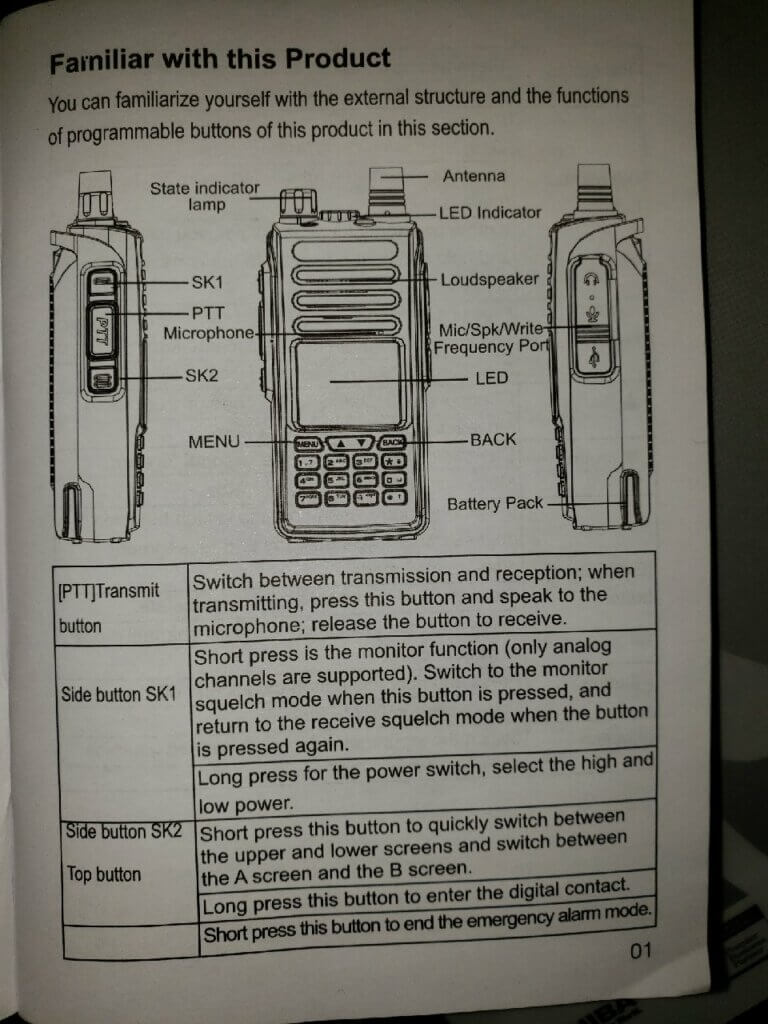
This is the manual that came with the radio. The picture looks nothing like the radio we received. Front panel is different. Side buttons are in different locations. Pressing a side button provides a completely different function than what the manual says. Different… and we can’t figure out what it’s doing.
So we do some web searches. There is an official manual on the Baofeng web site, but… it’s a radio manual. They are never very good. The manual lists features that this radio doesn’t have. Like the flashlight.
Why do Baofengs have a built-in flashlight?
To help you find your good radio.
VFO mode… or not
OK, let’s try entering VFO mode (that’s ham-speak for “enter the frequency manually” mode, instead of using presets).
No combination of buttons will put the thing in VFO mode. It’s presets or nothing. A search of the manual shows that you can go through a few level of menus to enter a frequency and other parameters. This is usually only required for duplex/repeater setup.
Search the web… all you find is the sobbing of radio buyers crying out for a VFO function. It doesn’t seem to exist. You have to run through the menus. Top left button is Menu then Settings -> Program Radio -> RX Frequency.
Update: there are a couple of ways we’ve figured out to move from presets to VFO. That’s in the programming section below.
Keep going from that menu… enter RX (receive) and TX (transmit) and the CTCSS frequency for a local repeater and we’re good to go.
Hit the transmit button and…
Local interference
SWEET JUMPIN’ JEEBUS IN A FARADAY CAGE! WHAT’S THAT NOISE?
As soon as I hit the transmit button, the paper shredder behind me starts running. Try it again. Same thing. Consistent, repeatable test from up to 4 feet away. BUT THE SHREDDER HAS NO REMOTE CONTROL FEATURE!
This shredder has some kind of touchless sensor that detects when you insert a piece of paper. Must be triggering it somehow -maybe induced voltage on the sensor’s wire acting as an antenna?
I’ve tried it in a couple of other rooms around the house. It induces clicks and buzzes in a clock radio that isn’t even on.
I took off the included antenna and hooked it to the cable to the outdoor antenna. No interference. So whatever it is, it’s coming off of the antenna and not the circuit board. Switched to a whip antenna. Same interference, so it’s not a defective antenna.
Note to self: hook up the RTL-SDR and see what the splatter looks like.
Update: other radios have the same effect – so it appears it’s the shredder’s problem and not specifically the DMX’s fault.
True dual-tuner operation
Finally! Something positive to say!
It is a true dual-tuner radio and you can monitor two channels simultaneously.
One of the side buttons switches between the A and B frequencies. Punch in separate frequencies for A and B, and it is monitoring both simultaneously. Hitting the top-right Back button mutes and unmutes the second frequency.
Programming the radio
A quick check to see if Chirp supports the radio… and no luck.
Oh. Right. It’s a DMR radio. That means the dreaded code plug. Which requires software. Which was not included with the radio.
First try for software: contact Baofeng
It’s hard to find the real Baofeng company website because so many websites selling their radios falsely claim to be official Baofeng sites. With a little digging, we found these official company sites for Fujian Baofeng Electronic Co:
- The official Baofeng facebook page
- The official Baofeng corporate web page – which has a download section, but with nothing for this radio. This is where we got the manual.
- The official Baofeng page on the Alibaba e-commerce website
We put messages on all three asking where we could get programming software and firmware download for the radio.
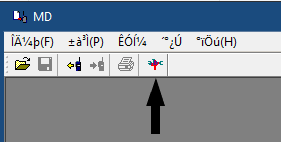
Update: We got a message back from the corporate site, where we found the radio listed as the DM-1702B, which for download shows only a manual. They referred us to the page for the DM-1702, which contains the most recent version of the programming software V1.00.79 – with Chinese installation menus. After a few failed attempts – we had to guess which buttons are OK and Cancel in Chinese – we got it installed. It comes up in Chinese, but if you hit the button in the picture below, it switches to the English menus.
But… despite repeated requests… they don’t put the firmware updates on the website. Feel free to submit your own messages and up the pressure.
Second try: search the web
We found various forums, videos and Baofeng-selling radio sites that have a variety of firmware and programming software versions. Some claim that some of the releases had viruses and had to be cleaned up.
To make a long story short and save you some pain:
- Programming software and firmware indicated for DMX or DM-1702 works.
- Programming software for other Baofeng radios like the DM-1701 and DM-1716 does not work for this radio.
- Programming software and firmware are often found together in a bundle.
- The programming software is an executable called either CPS.exe or CPS2_extra_menus.exe.
- The latest version we found is 1.00.78 Update: see above for link to the programming software on the Baofeng site. It has the extra menus.
- The software seems to be specific to the radio model. The CPS.exe for other radios doesn’t work.
- The _extra_menus software provides extra screens requiring a password. Best not to touch the values… but if you’re curious, the password is 66660501.
- The firmware to download to the radio is in a file of the form fw_2.2.22-decrypted.zip. The version without decrypted in the name doesn’t seem to load.
- Our radio shipped with 2.2.14
- 2.2.22 is the most recent we’ve found
- To display the firmware version: Menu -> Settings -> Radio Info -> Versions
We recommend upgrading to the latest software before configuring the radio. A few things were cleaned up since the earlier version.
Upgrading the firmware
This video provides instructions and links to download the software and firmware, and takes you through the entire process. If for some reason the links are missing, we saved a copy here with CPS 1.0.78 and firmware 2.2.22.
You will need a programming cable – and the good new is that any micro-USB cable will work. There is a cable from Baofeng that plugs into the mic jacks, but it’s not required.
The process is straightforward:
- Download and start the CPS software
- Turn off the radio and connect it to the PC with the USB cable
- Hold down the # key while powering on the radio
- From the CPS program, select Program -> Tool and pick your firmware
Note: Functions for loading/unloading configuration or firmware in the CPS software will pop up a window that looks like something is happening… but it sits there doing nothing. You have to hit the OK button to get things started.
Configuring/programming the radio from CPS
After starting the CPS program, you need to read the current configuration from the radio. Then all the screens are enabled.
Here are a few highlights.
It’s a good idea to save the configuration before making any changes. That way, you can restore it if you really mess it up.
Buttons
The most useful part of the CPS program is the ability to configure the three buttons – the two on the left side, under the transmit button, and one on the top, under the General Setting -> Buttons screen. The three buttons are identified on the screen as follows, wity our preferred settings for them:
- Side-bottom (immediately under transmit): Middle
- Short press: Up and Down Screen (for A/B switch)
- Long press: VOX
- Side-middle: Moni
- Short press: Monitor (turns off squelch)
- Long press: Adjust power level (low 1W or high 5W)
- Top of the radio: Top
- Short press: Scan
- Long press: Battery power indicator
The P1, P2 and P3 buttons are not available on this radio.
There are a bunch of other functions that can be programmed on to the buttons. Just remember that many of them don’t exist on the radio.
Parameter, Menu and other CPS screens
Lots of different settings that you either can’t set from the radio, or that are easier to set on the screens. Have fun looking around.
Look on the Parameter page for things like enabling GPS and APRS.
DMR and station pre-sets
This is where things get a little hairier. We’re not going to get into a detailed explanation of DMR – a sort-of-standard for digital communication – because there is lots of good information elsewhere.
- This youtube video takes you slowly and methodically through the process of setting up DMR contacts in the CPS software.
- A great site for Baofeng info, Miklor has a good DMR tutorial. He also has his own page on the DM-1702.
- The best guide I’ve seen for DMR is here. There are lots of sites with names like DMR for dummies and that claim to provide decent overviews. Anything like this I’ve found has been incomplete. Stick to the link at the star of this paragraph.
- For general rules on programming radios, DMR-MARC has this page.
What you need to know: All channel presets on this radio – analog or digital/DMR – are tied to a DMR zone. If you are setting up analog simplex or duplex/repeater channels in the Channel menu of CPS, you must do the following or they won’t show up on your radio presets.
- Assign the channel to an RX Group List – do not leave the value as None
- . Assign the channel to a Zone on the Zone menu.
DMR Usage
We’re still working through this. Miklor’s page on the DM1702 says that you can’t monitor a digital talk group on a repeater. We’ve found that when connecting to a repeater, we are hearing whatever is on the channel.
What we have not been able to do is confirm DMR transmission from the DM-1702. Even connecting to the Parrot 9990 channel – it’s a test channel that repeats back what you transmit – we can’t get a response back.
But we are new to DMR, so maybe we’re making a mistake. Maybe it’s something to do with the local repeaters. The local club is heavily biased towards Fusion, a different digital radio spec.
Well keep working it.
VFO – with frequency display (no label/text)
In the CPS configuration program, after you have read in the config from your radio or from a file, you can go to General Settings -> Parameter. Near the bottom right corner, there’s a setting for Frequency/Channel Mode. If you set it to Frequency and update the radio… Yeah! You can enter the frequency manually!
To switch between VFO and preset mode, hold down the Back button (top right corner) for about 5 seconds.
Unfortunately, in this mode, presets are only displayed with the frequency. The name/label is not available.
VFO – with frequency label
This may be a blessing in disguise. The problem with VFO is that if you’re doing it with repeaters, entering the offset and CTCSS setting from the radios’ menus can be difficult.
The DMX makes it really easy to do from the settings screen.
So here’s how we handle VFO if we want names instead of the frequency displayed:
- From the CPS menu, go to Channel -> __Channel
- At the bottom of the list, add three channels
- VFO3DMR
- VFO2CT, channel type analog, with CTCSS
- VFO1ANALOG, channel type analog, with no CTCSS
By doing it in this order, when you scroll back down from presets 3…2…1 you then hit your VFO channels. Don’t forget to assign the channels to Zones, or they won’t display.
To assign as frequency as if you were doing VFO:
- Go to the preset you want to modify (one of the three we set up)
- Menu (top left button)
- Settings (might need to hit up or down arrow(
- Program Radio
- You are now making changes to the VFO channel you want to modify!
- The menus make it easy to change each of the settings
- The settings are appropriate to analog or digital based on the preset type
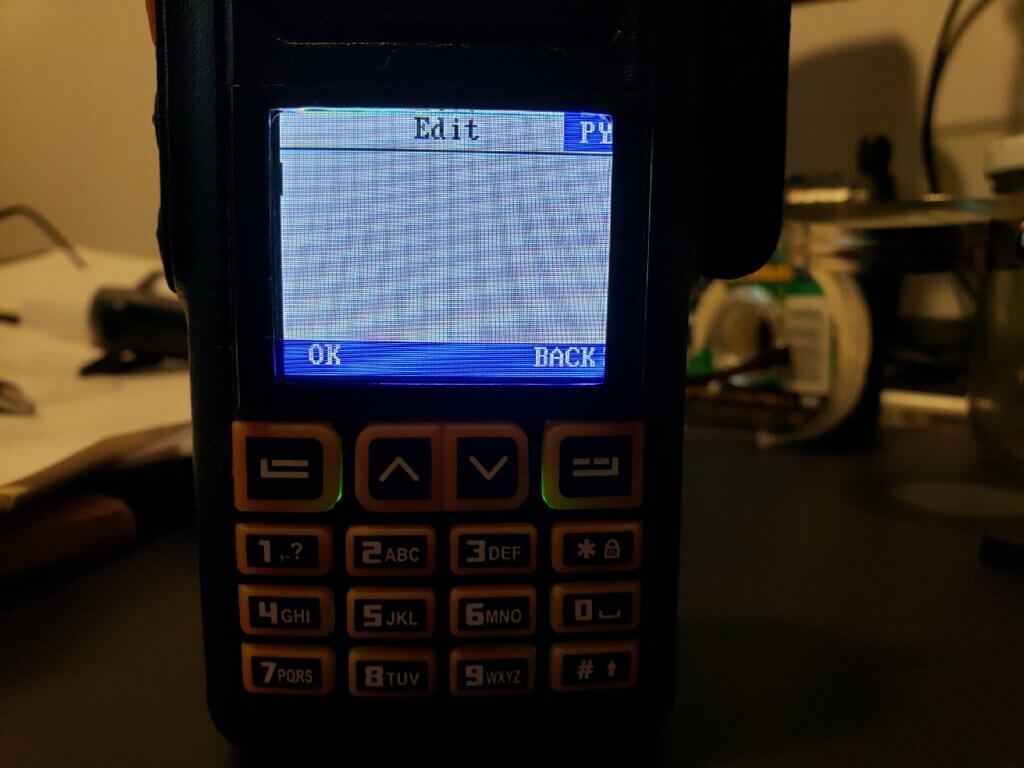
- For the frequency, you will get a box with a frequency. Hit OK again to go to the edit screen. The top right button is now a backspace key, and you can use the numbers to enter your frequency. Hit OK when done.
- Program Radio
- Settings (might need to hit up or down arrow(
I use a separate preset channel for CTCSS because if encode or decode settings are on for the channel you picked, you might forget about it, and you won’t be able to transmit or receive unless you clear them.
Sending DTMF tones
- Be sure you are on an analog channel.
- Press the # key (will have no effect if on digital channel)
- Enter your tones.
- Up/Down arrows: AB
- Menu (Top left corner) button: C
- Back (Top right corner) button: D
- Press PTT to send
If you make a mistake and don’t want to send, there is no way to clear what you entered. Power the radio on and off. Seems dumb, but then again, on any other radio, the tones are sent as your press the keys.
Entering text
If you want to type in a message, enter a label, or whatever else that requires text, the behaviour is, at first… bizarre. You can enter a couple of characters, then Chinese characters start showing up. That’s a good thing if Chinese is what you want. As for the rest of us…
In the upper-right hand corner of the screen, you see the letters PY. That means the radio is set for Pynyin text entry, a method for entering Chinese characters using the western alphabet.
If you click the # key, you can see the PY change. It will cycle through four character sets:
- PY: Pynyin
- 123: Numbers
- abc: Lower case letters, with the zero key as space
- ABC: Upper case letters, with the zero key as space
For editing:
- Up-arrow: cursor left
- Down-arrow: cursor right
- Back key(upper-right corner): backspace/delete
If you need spaces when entering numbers, you need to back-and-forth to the alphabet modes.
If all else fails…
This forum has been a great source of information and has an active community around this radio. One of the posters on the forum shares a google drive with firmware updates. Before using any of the updates, be sure to read through the forum for words of advice and caution.
When using the forum, you’ll notice a skinny vertical slider bar on the right of the window. Pull it down to the bottom to get the most recent posts and work your way back up.
The forum has a post we have not tested yet on configuring the radio for APRS.
Conclusions
With a bit of work… actually a lot of work – the DMX /DM-1702 becomes usable. We have verified that it can receive DMR, but maybe because of our own experience with DMR – it’s our first attempt – we have not been able to confirm transmit capability.
The real problem is the Baofeng support for this radio. They’ve made a couple of firmware upgrades, but they won’t publish them on their own site. Finding the upgrades and the software to feed them into the radio is a bit of a nightmare. There’s no excuse for this – Baofeng has the website already configured. All they need to do is drop in the files and put up a link.
It’s disappointing, because we think the radio is one firmware update away from being really usable.
In the meantime… it was cheap, and for the price we paid, it’s a good, basic, true dual-tuner radio. We ordered it directly from China. For what local dealers are charging – forget it. We’ve learned a fair bit about DMR and code plugs… and have a lot more to learn.
But don’t buy it. If you already bought it, like we said at the top, we put up this page to help others who made the same mistake we did.
And I have a really useless remote control for the paper shredder.
Change history:
- 2021-02-19: Added section on text entry


YLab
123 Hillsview Dr, Richmond Hill, ON L4C 1T3